Mastering the Art of Tilt-Shift: Creating Stunning Miniature-Style Photography
Tilt-shift photography is one of those techniques that can transform an ordinary scene into something extraordinary. It plays with perspective and focus, creating an illusion that makes real-life locations look like tiny, toylike models. The first time I experimented with tilt-shift, I was mesmerized—suddenly, towering cityscapes looked like scale models, bustling streets became miniature dioramas, and even landscapes seemed like something out of a tiny world.
Whether you’re using a dedicated tilt-shift lens or simulating the effect in post-processing, learning how to master the art of miniaturization can take your photography in an entirely new direction. In this post, I’ll break down what tilt-shift is, why it works, and how you can achieve the effect both in-camera and in post-production.
What is Tilt-Shift Photography?
Tilt-shift photography originates from the world of large-format cameras, where photographers physically tilt and shift the lens to control perspective and focus. Originally, this was used for architectural photography, allowing photographers to correct perspective distortion (think of how tall buildings can appear to "lean" in traditional shots).
But then, creative photographers started using tilt-shift techniques in a completely different way—by selectively blurring parts of an image to make full-scale scenes look miniature. This effect plays with our depth perception, making large objects appear small, almost as if they belong in a tiny model train set.
Why Does the Miniature Effect Work?
Our brains interpret depth based on focus. In real life, when we look at small objects up close, we see a shallow depth of field—foreground and background elements blur, while the subject remains crisp.
Tilt-shift mimics this shallow depth of field in a large-scale scene, tricking our brains into perceiving it as something much smaller. When done right, the effect is mind-blowing. It makes a real-world setting look surreal, as if it's been plucked from a miniature model city or a handcrafted landscape.
How to Create the Tilt-Shift Effect
There are two main ways to achieve the tilt-shift miniature effect:
Using a Tilt-Shift Lens – If you're serious about tilt-shift photography, investing in a dedicated tilt-shift lens (like the Canon TS-E 24mm or Nikon PC-E 45mm) gives you full control over perspective and focus.
Editing in Post-Processing – If you don’t have a tilt-shift lens, you can easily replicate the effect in Photoshop, Lightroom, or even mobile apps.
Let’s break down both methods.
1. Shooting Miniature-Style Photography with a Tilt-Shift Lens
A tilt-shift lens allows you to manipulate the focus plane, bending it to achieve selective focus in different parts of the image. Here’s how to use one effectively for miniaturization:
Step 1: Find the Right Perspective
The best miniature-style shots are taken from a high vantage point, looking down at a scene. Think rooftops, balconies, or even drone photography.
Choose scenes with a lot of small details—busy streets, construction sites, or train stations work great.
Step 2: Adjust the Tilt
Instead of keeping everything sharp, tilt the lens to create a shallow depth of field that mimics macro photography.
The sweet spot is keeping a sharp band of focus in the middle while the top and bottom blur out.
Step 3: Use a Narrow Aperture
Unlike traditional shallow depth of field photography, keeping the aperture at f/5.6 or higher helps maintain detail while still achieving the blur effect.
Experiment with different angles and distances to perfect the effect.
Step 4: Increase Contrast and Saturation
Miniature models often have vibrant colors, so boosting contrast and saturation helps sell the effect.
A bit of clarity and sharpening can also enhance the look.
2. Creating the Tilt-Shift Effect in Post-Processing
If you don’t have a tilt-shift lens, no worries! You can achieve a very similar effect using Photoshop or Lightroom.
Using Photoshop
Choose the Right Image
The best images for tilt-shift editing are shot from above, overlooking a scene. City streets, stadiums, and even landscapes work well.
Apply a Blur Gradient
Open the image in Photoshop and go to Filter > Blur Gallery > Tilt-Shift.
Adjust the blur strength and position the sharp focus band in the middle of the image.
Everything above and below this band will gradually blur out, mimicking the look of a shallow depth of field.
Boost Contrast and Saturation
Use Curves or Levels to enhance contrast.
Increase the Vibrance and Saturation slightly to make colors pop, reinforcing the miniature illusion.
Fine-Tune with Sharpening
Apply slight sharpening to the sharpest areas to create a sense of fine detail.
Using Lightroom
In Lightroom, you can achieve a similar effect using Radial Filters or the Graduated Blur Effect.
Use Clarity and Dehaze strategically to enhance the illusion of a tiny model world.
Fun Ideas for Tilt-Shift Photography
Now that you know how to create the effect, here are some great subjects to try:
✅ City Streets – Capture cars, buses, and pedestrians moving through an intersection from a high angle.
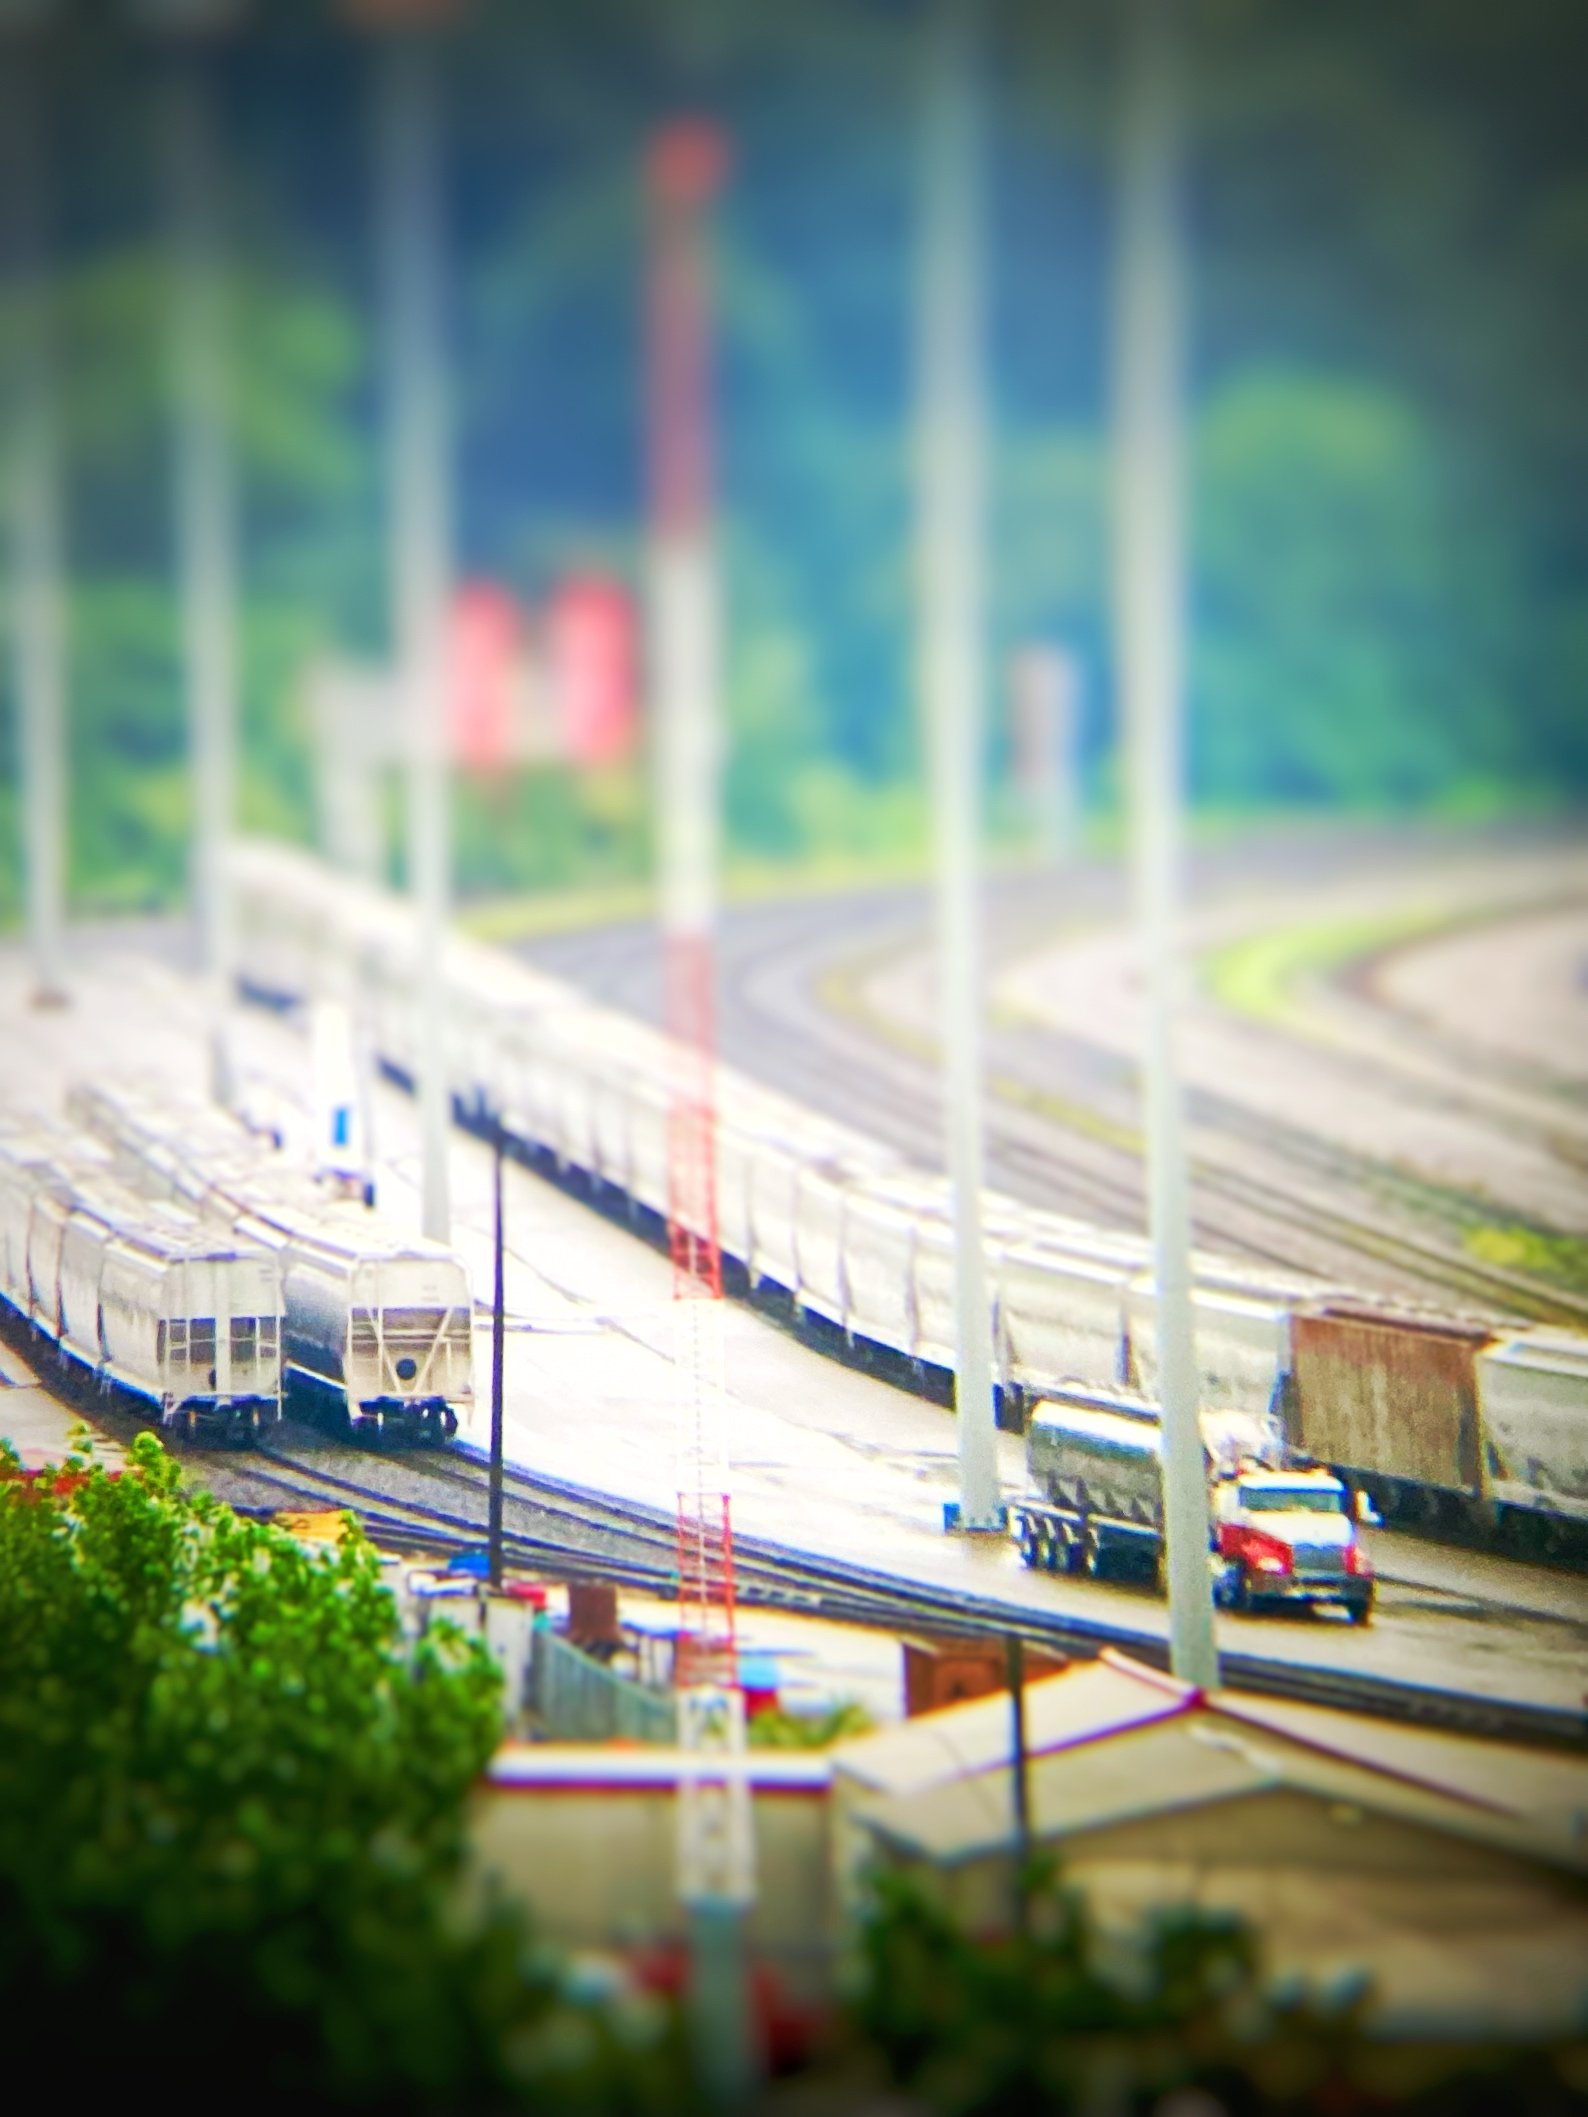
✅ Train Stations & Airports – The movement of people and transportation makes for incredible miniaturized scenes.
✅ Construction Sites – Cranes, workers, and machinery look fantastic with the tilt-shift effect.
✅ Parks & Beaches – Groups of people lounging in open spaces make for great compositions.
✅ Events & Parades – The colorful and organized nature of festivals creates an amazing model-like feel.
✅ Amusement Parks – Rides, roller coasters, and crowds look incredible when shrunk down in perspective.
Bonus: Creating Tilt-Shift Timelapses
For an extra layer of fun, try combining tilt-shift with timelapse photography. When sped up, the movement of people and vehicles within a tilt-shift scene makes them look like tiny toys coming to life.
How to do it:
Set your camera to interval shooting mode and take a shot every 1-2 seconds for about 10-20 minutes.
Apply tilt-shift effects in post-processing.
Speed up the footage in video editing software like Premiere Pro or DaVinci Resolve.
The result? A mesmerizing miniature world in motion.
Final Thoughts: Why I Love Tilt-Shift Photography
Tilt-shift photography is more than just a technical trick—it’s a way to see the world differently. It takes familiar landscapes and turns them into something playful, making reality feel surreal. Whether I’m shooting from a rooftop in a bustling city or editing a landscape shot to look like a tiny toy set, I love the whimsical, dreamlike quality this effect brings.
The best part? It’s just fun. No rules, no pressure—just a creative way to reimagine the world through a different lens.
So, if you haven’t tried it yet, grab your camera (or your favorite editing software) and start shrinking the world. You might be surprised at just how magical it looks.


How to Create a Tilt-Shift Miniature Effect in Snapseed
Step 1: Open Your Image in Snapseed
Launch Snapseed on your phone.
Tap the “+” icon to select and open the image you want to edit.
The best images for tilt-shift effects are taken from a high angle, overlooking a street, park, or cityscape.
Step 2: Apply the Lens Blur Effect
Tap Tools at the bottom of the screen.
Select Lens Blur (this will be used to create the tilt-shift effect).
Step 3: Adjust the Blur Placement
Once the Lens Blur tool is active:
Two white horizontal lines will appear on your image, with a sharp focus area in the middle and blur zones above and below.
Drag the center of the focus area to where you want the sharpest part of the image (e.g., the middle of a street, a cluster of people, or moving vehicles).
Pinch with two fingers to adjust the width of the focus band.
Narrower bands enhance the miniature effect.
Wider bands create a subtler tilt-shift look.
Step 4: Customize the Blur Intensity
Blur Strength: Slide left or right to increase or decrease the blur effect. More blur enhances the miniature look.
Transition Strength: Controls how smoothly the blur fades into the focused area. A sharper transition mimics real miniature photography.
Once you’re happy with the blur placement and intensity, tap the checkmark (✔) to apply.
Step 5: Boost Colors and Contrast (Optional, but Recommended!)
Miniature models often have bright, punchy colors to enhance the illusion. You can tweak your image further using Snapseed’s tools:
Tune Image (Found in Tools → Tune Image)
Increase Saturation to make colors pop.
Adjust Contrast to make the scene look more dynamic.
Brighten the image slightly if needed.
Details Tool (Tools → Details)
Increase Structure slightly to add clarity to the focused area.
Sharpen lightly for added crispness.
Step 6: Save and Share Your Miniature Masterpiece
Once you’re satisfied with your tilt-shift effect, tap Export and choose Save a Copy to keep your original image untouched.
Now you have a fun, miniature-like version of your photo ready to share!
Bonus Tips for a More Realistic Miniature Effect
✔ Choose the Right Image – High-angle cityscapes, crowded streets, and landscapes work best.
✔ Add a Vibrant Look – Tilt-shift works best with colorful, well-lit images.
✔ Experiment with Different Blur Strengths – Too much blur can make it look artificial; too little may not sell the effect.
✔ Try Editing a Timelapse Frame – Tilt-shift + time-lapse makes an incredible miniature motion effect!